Wednesday, May 4, 2011

Final Product


Now with both the barrel and the handle complete, we have a final product. We haven't been able to test it out but it looks great and rolls well.
Once we properly secure the handle to the barrel we think the soil tamp will be a great tool for the green house users.

Finished Handle!


We were able to construct the handle in two class times, and Elliott was able to even paint it. Luckily we didn't run into any problems with the handle. Now all we have to do is attach it to the barrel.

New Handle Design


After consideration we've decided to go with a different handle design. Instead of using the split bike fork we'll build a handle from scratch. Here's a picture of the new design. ^

Handle


This is the design for the handle.

Finished Barrel!


We grinded down the sides of the barrel so no sharp edges stick out and now we'll begin work on the handle.

Final Touches


When attaching the mesh to the barrel we welded the mesh to both the wheel rims and the rebar that stretched across both rims. Some of the mesh sticks off the end, so next we'll have to grind that down so there aren't any sharp edges.

Finishing the Barrel


After attaching the mesh to the barrel we still have to go back and cut off the excess mesh and patch a few of the holes.

Attaching Rolled Mesh to the Barrel.


We've figured out a little late that rolling the mesh was not a good idea. With the mesh curved it's a lot harder to attach to the barrel than it would be if it were flat. Unfortunately it's too late to do anything about it so we'll just have to work with what we've got.

Monday, April 18, 2011

Adding Mesh to the Barrel


Now we have to attach the mesh to the rebar and wheel barrel. First we'll roll out the mesh to give it a curve, which should make it easier to attach to the barrel, and we'll just weld the sides to the wheel rims as we go. You can see a picture of the mesh we are using above. ^

Monday, April 4, 2011

Monday, April 4th


Today we are finishing welding the rebar to the wheels. After the added weight of the rebar is attached to the wheels we'll be able to determine if we need to add more weight to the cylinder. Evan had suggested to us to have a weight of around forty pounds. Adding weight shouldn't be too hard but hopefully it's around forty pounds so we only need a little more weight to tip the scales.

Monday, March 28, 2011

The Split Bike Fork

Rebar

Monday, March 28th

Today we got a lot of work done. We cut all the pieces of rebar we need, we cut the bicycle fork in half, grinded the ends of the rebar, and began to weld the rebar onto the wheel. After the first few welds, the barrel looks like it rolls evenly! Next class we hope to finish the welding the rebar, and begin and finish welding the diamond shaped mesh onto the barrel.

Schedule

In the next upcoming weeks we plan on finishing our project. We've put together a schedule to follow to keep ourselves on track and to have a steady amount of progress throughout the course. So far we have our design finalized, the wheels grinded down and bend, and the rebar cut. Next working class we'll weld the rebar to the wheels. The class after that we'll come to an agreement on the exact design of the handle, and we'll cover the barrel with the diamond shaped mesh. And finally we'll construct and attack the handle, and our project will be done. After that we'll probably get it looked over by Donna, Evan, and all the other greenhouse staff. With more than three working classes available to us, and open shop hours I'm very confident that we'll be able to finish our project, not only on time, but early.

Tuesday, March 22, 2011

Model


Elliott was able to build a miniature model of our design. He welded wire between two washers making the cylinder body. For our actual we plan on using miniature bicycle wheels and rebar. We originally planned to just have the rebar welded to the wheels but after meeting with Evan he suggested using a wire mesh to cover the rebar, so that more of a pattern would be packed into the soil, that rebar alone wouldn't work. So for our model we wrapped wire mesh around the length of the cylinder. And plan to weld diamond shaped mesh around the cylinder or our soil tamper.

Final Design


After meeting with Evan, a worker at the green house worker, we were able to narrow down our design. We came to the conclusion that a barrel body, bar handle, and wire mesh exterior were necessary aspects to include to build the best possible soil tamper.

Tuesday, March 1, 2011

Soil Tamper Project -- Design Criteria, Problems, and Narrative

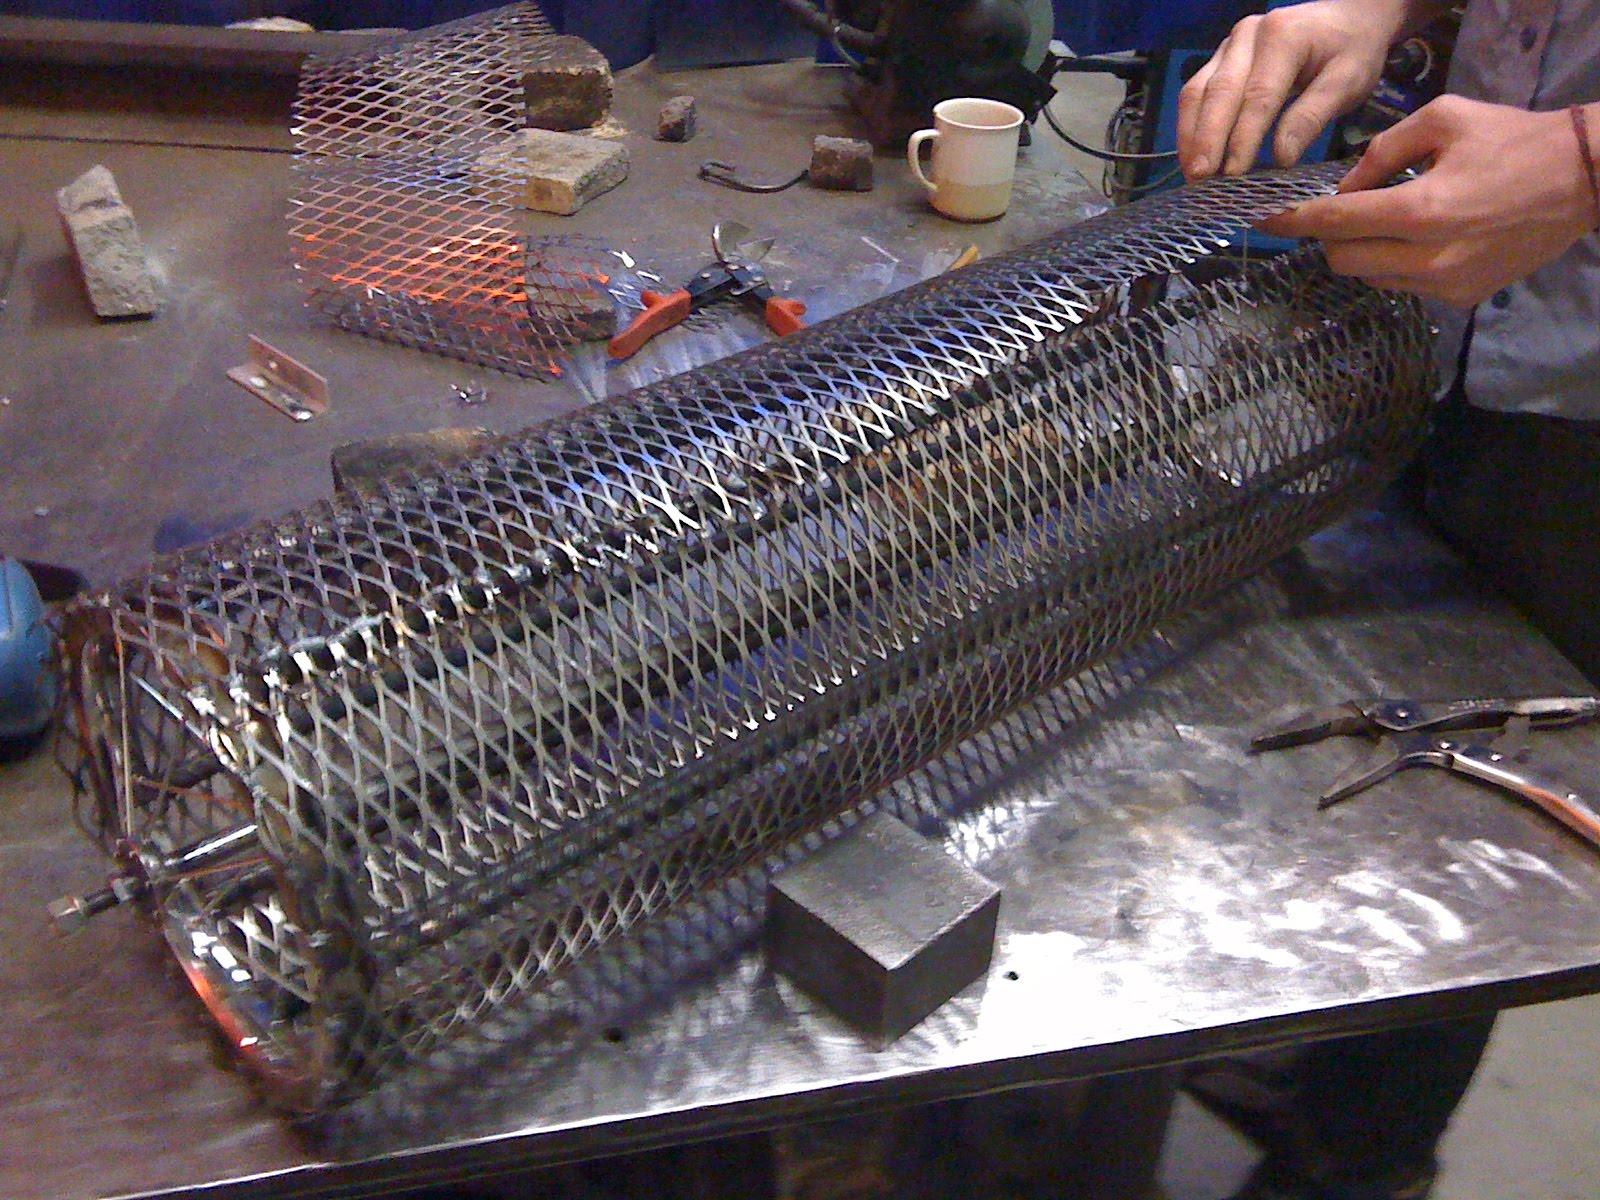
The Hampshire College farm workers met with the class to propose some notable design problems with us, mostly relating to the Greenwich greenhouse. This particular one, which we will call the soil tamper, is based on the following prerequisites and problematic: soil inside the greenhouse has to be firmly packed down during certain times in the farming cycle. So far, the farmers have been using a single hand rake to pack down the soil, which has little surface area, requires a bit of force to tamp the soil with (it is very light), isn't ergonomic, and is very time consuming. Aside from these problems, there are further criteria: the serrated edges of the rake are important in that they texturize the soil, and this is desirable for the purpose of giving plants purchase. The workers suggested that a more efficient means would utilize the already-in-place row layout of the greenhouse (which would facilitate the workers being able to stand on the dirt paths in between crops rows, allowing less do-overs due to stepping on the tamped soil); perhaps a larger hand tool such as a large roller with some weight to it, that would roll over the soil instead of having to tamp over and over with the same small instrument. A tool allowing a more relaxed posture would also be desirable. In addition, I would add that the design be simple and appropriate in the sense of easy repair and fabrication; in theory, one could build some sort of fancy robot to do this work, or the like, but this would not be desirable or feasible. The tool should also be appropriately durable for the hardships of frequent use in an agricultural environment.